Frontend at Bestmile
In the Fall of 2017, Bestmile was looking for a frontend developer. The team found the person they were looking for in Jean-Baptiste Cochery. And then, I applied. In a bet that would ultimately pay off really nicely, Bestmile decided to hire both of us, 1 month apart, in early 2018. At the time, there was no dedicated frontend team in place. The 3 existing web apps had been worked on by people who either left the company, moved on to become team lead or mobile developers, or were actually never really that much into frontend development in the first place. All of that led to the decision to scrap the existing main app called FMT, short for Fleet Management Tool. I usually am a bit apprehensive of starting something from scratch, with no business knowledge, as I tend to think newcomers will do the same mistakes again. So at first, I tried to move over some concepts of FMT to our new Operator Dashboard. Jean-Baptiste was less conservative and more keen on trying out new things. Our other differences in character traits turned out to be very complementary, while sharing the same core values and work ethics. Honestly, what more would you want? Well… a designer for example. Roughly 1 year after starting at Bestmile, our 2 people frontend team was joined by none other than our super dedicated and very prolific designer Shannon Alexandrine. In our endeavour, we were led by our diligent product-manager-slash-team-lead David Geretti. Here’s what the four of us came up with and built during the last 3.5 years.
Overview
At the time of writing, the following suite of applications constitutes the web frontend at Bestmile:
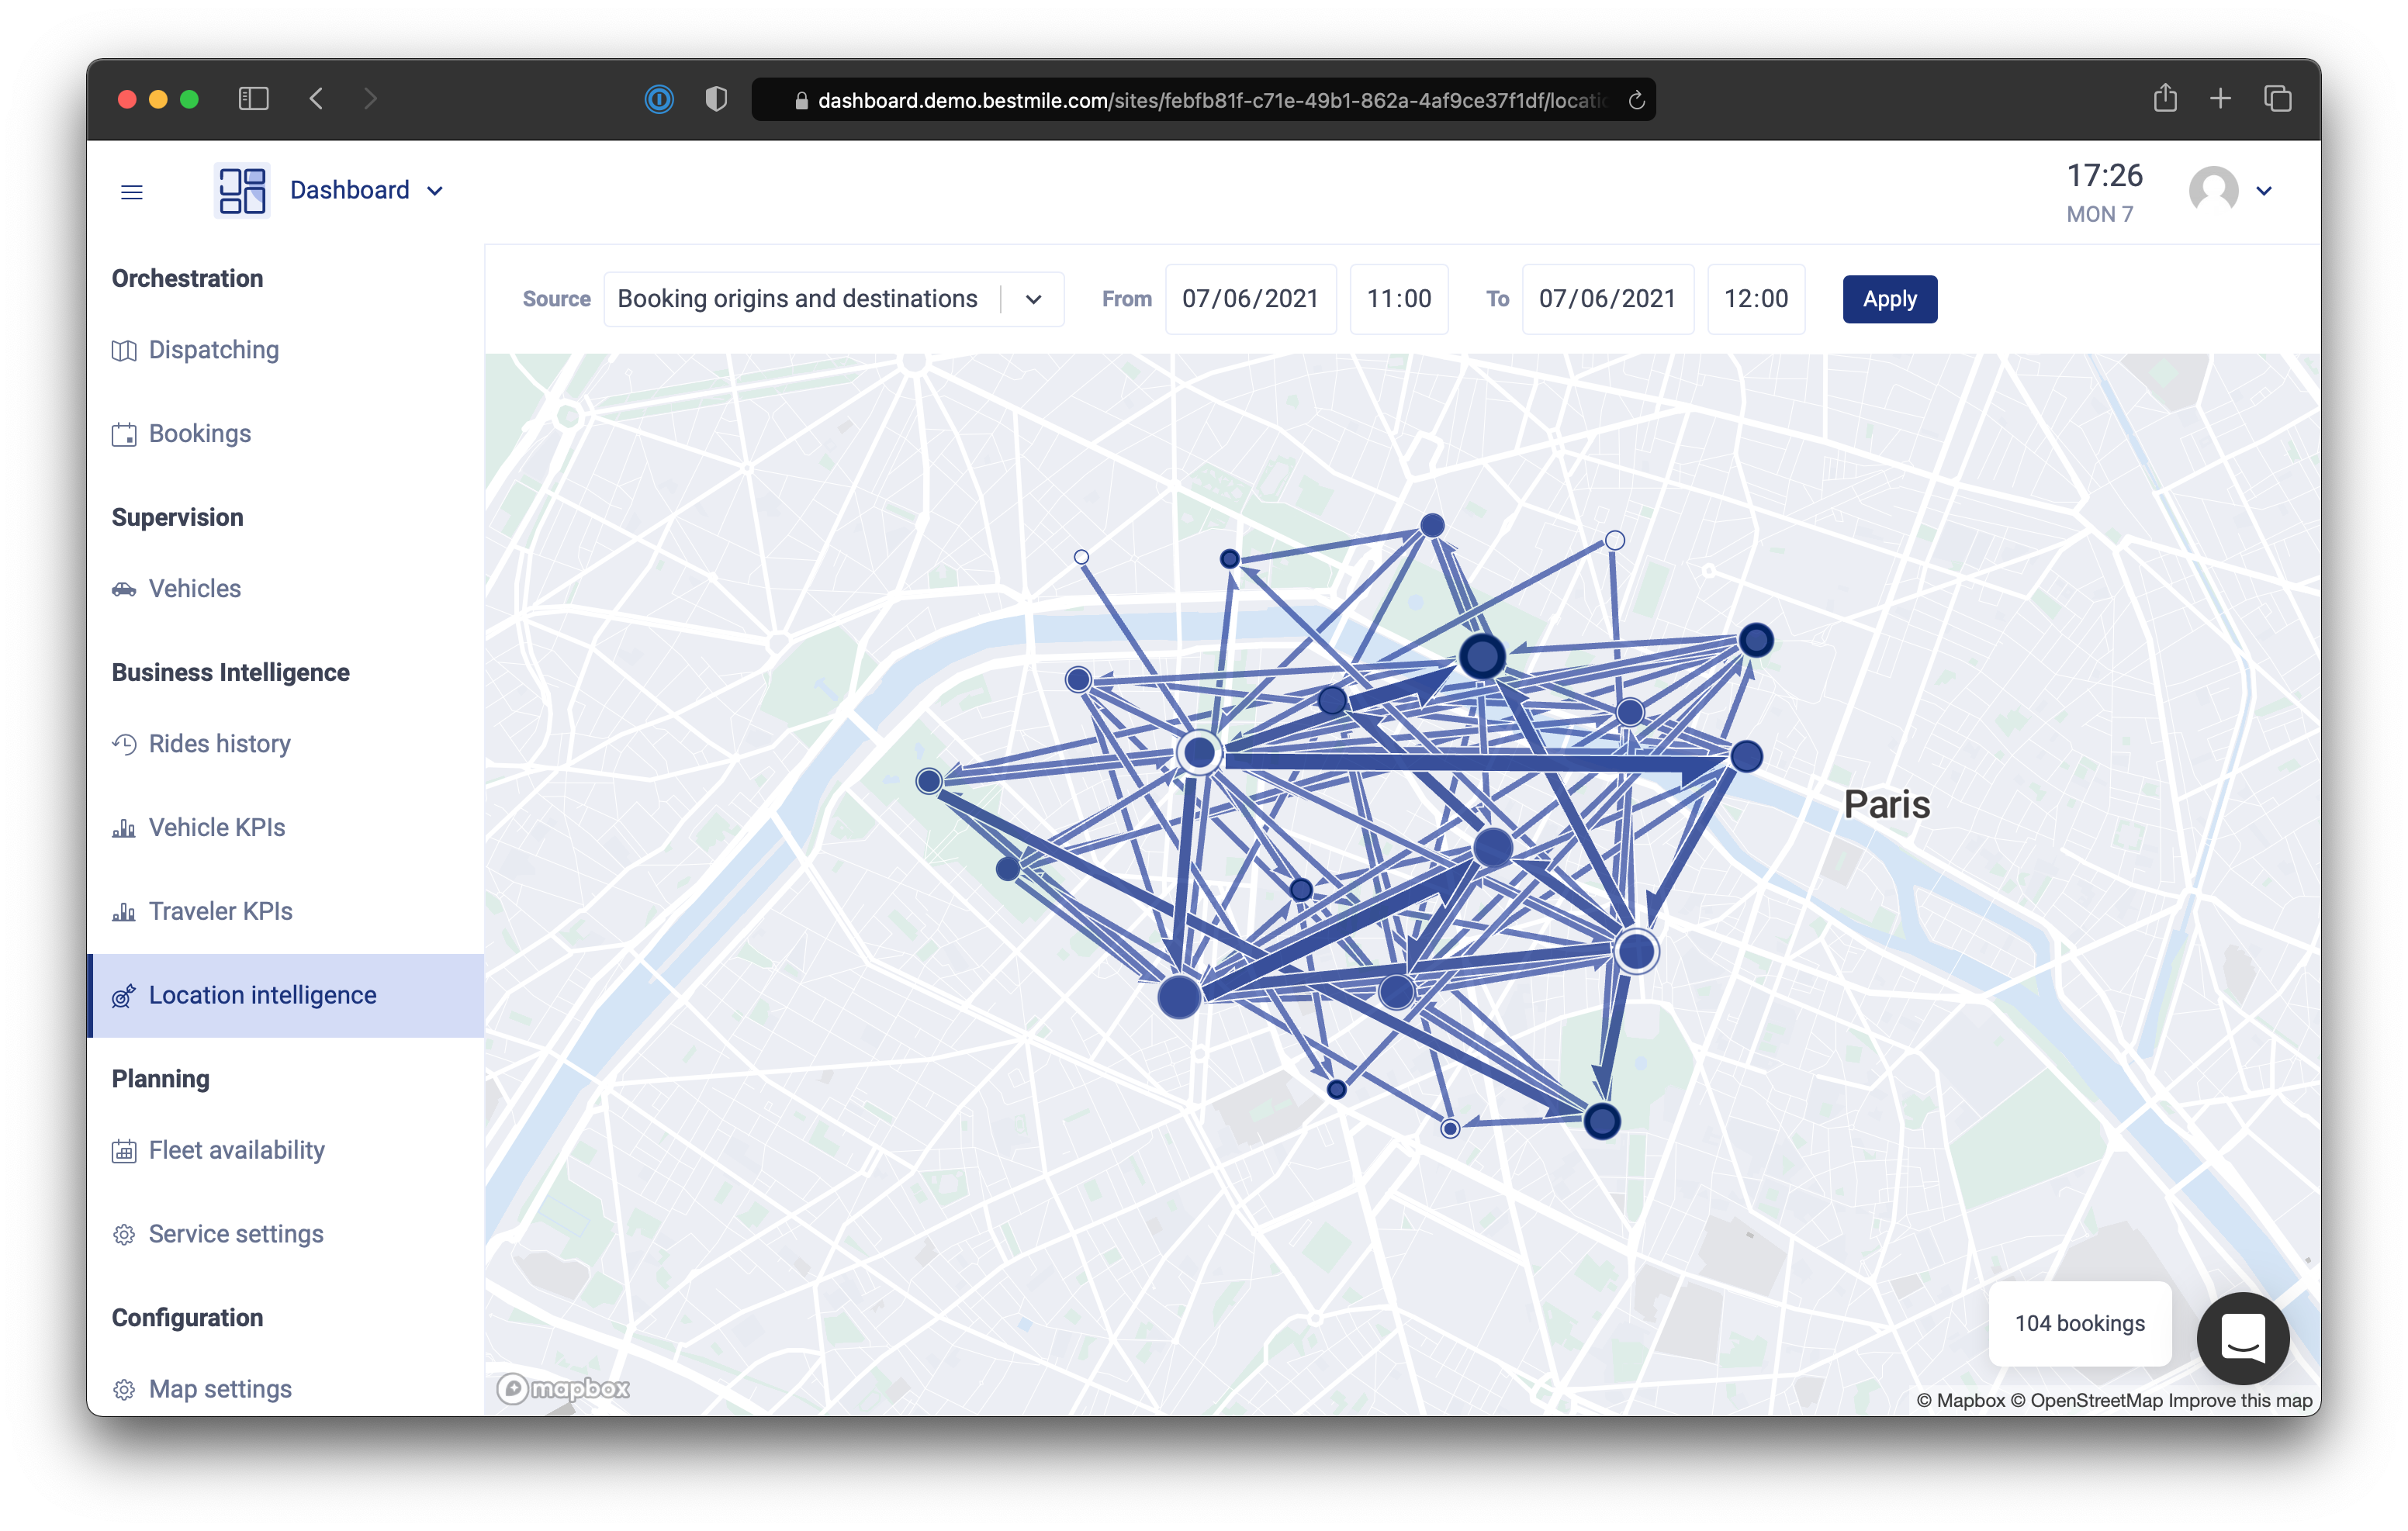
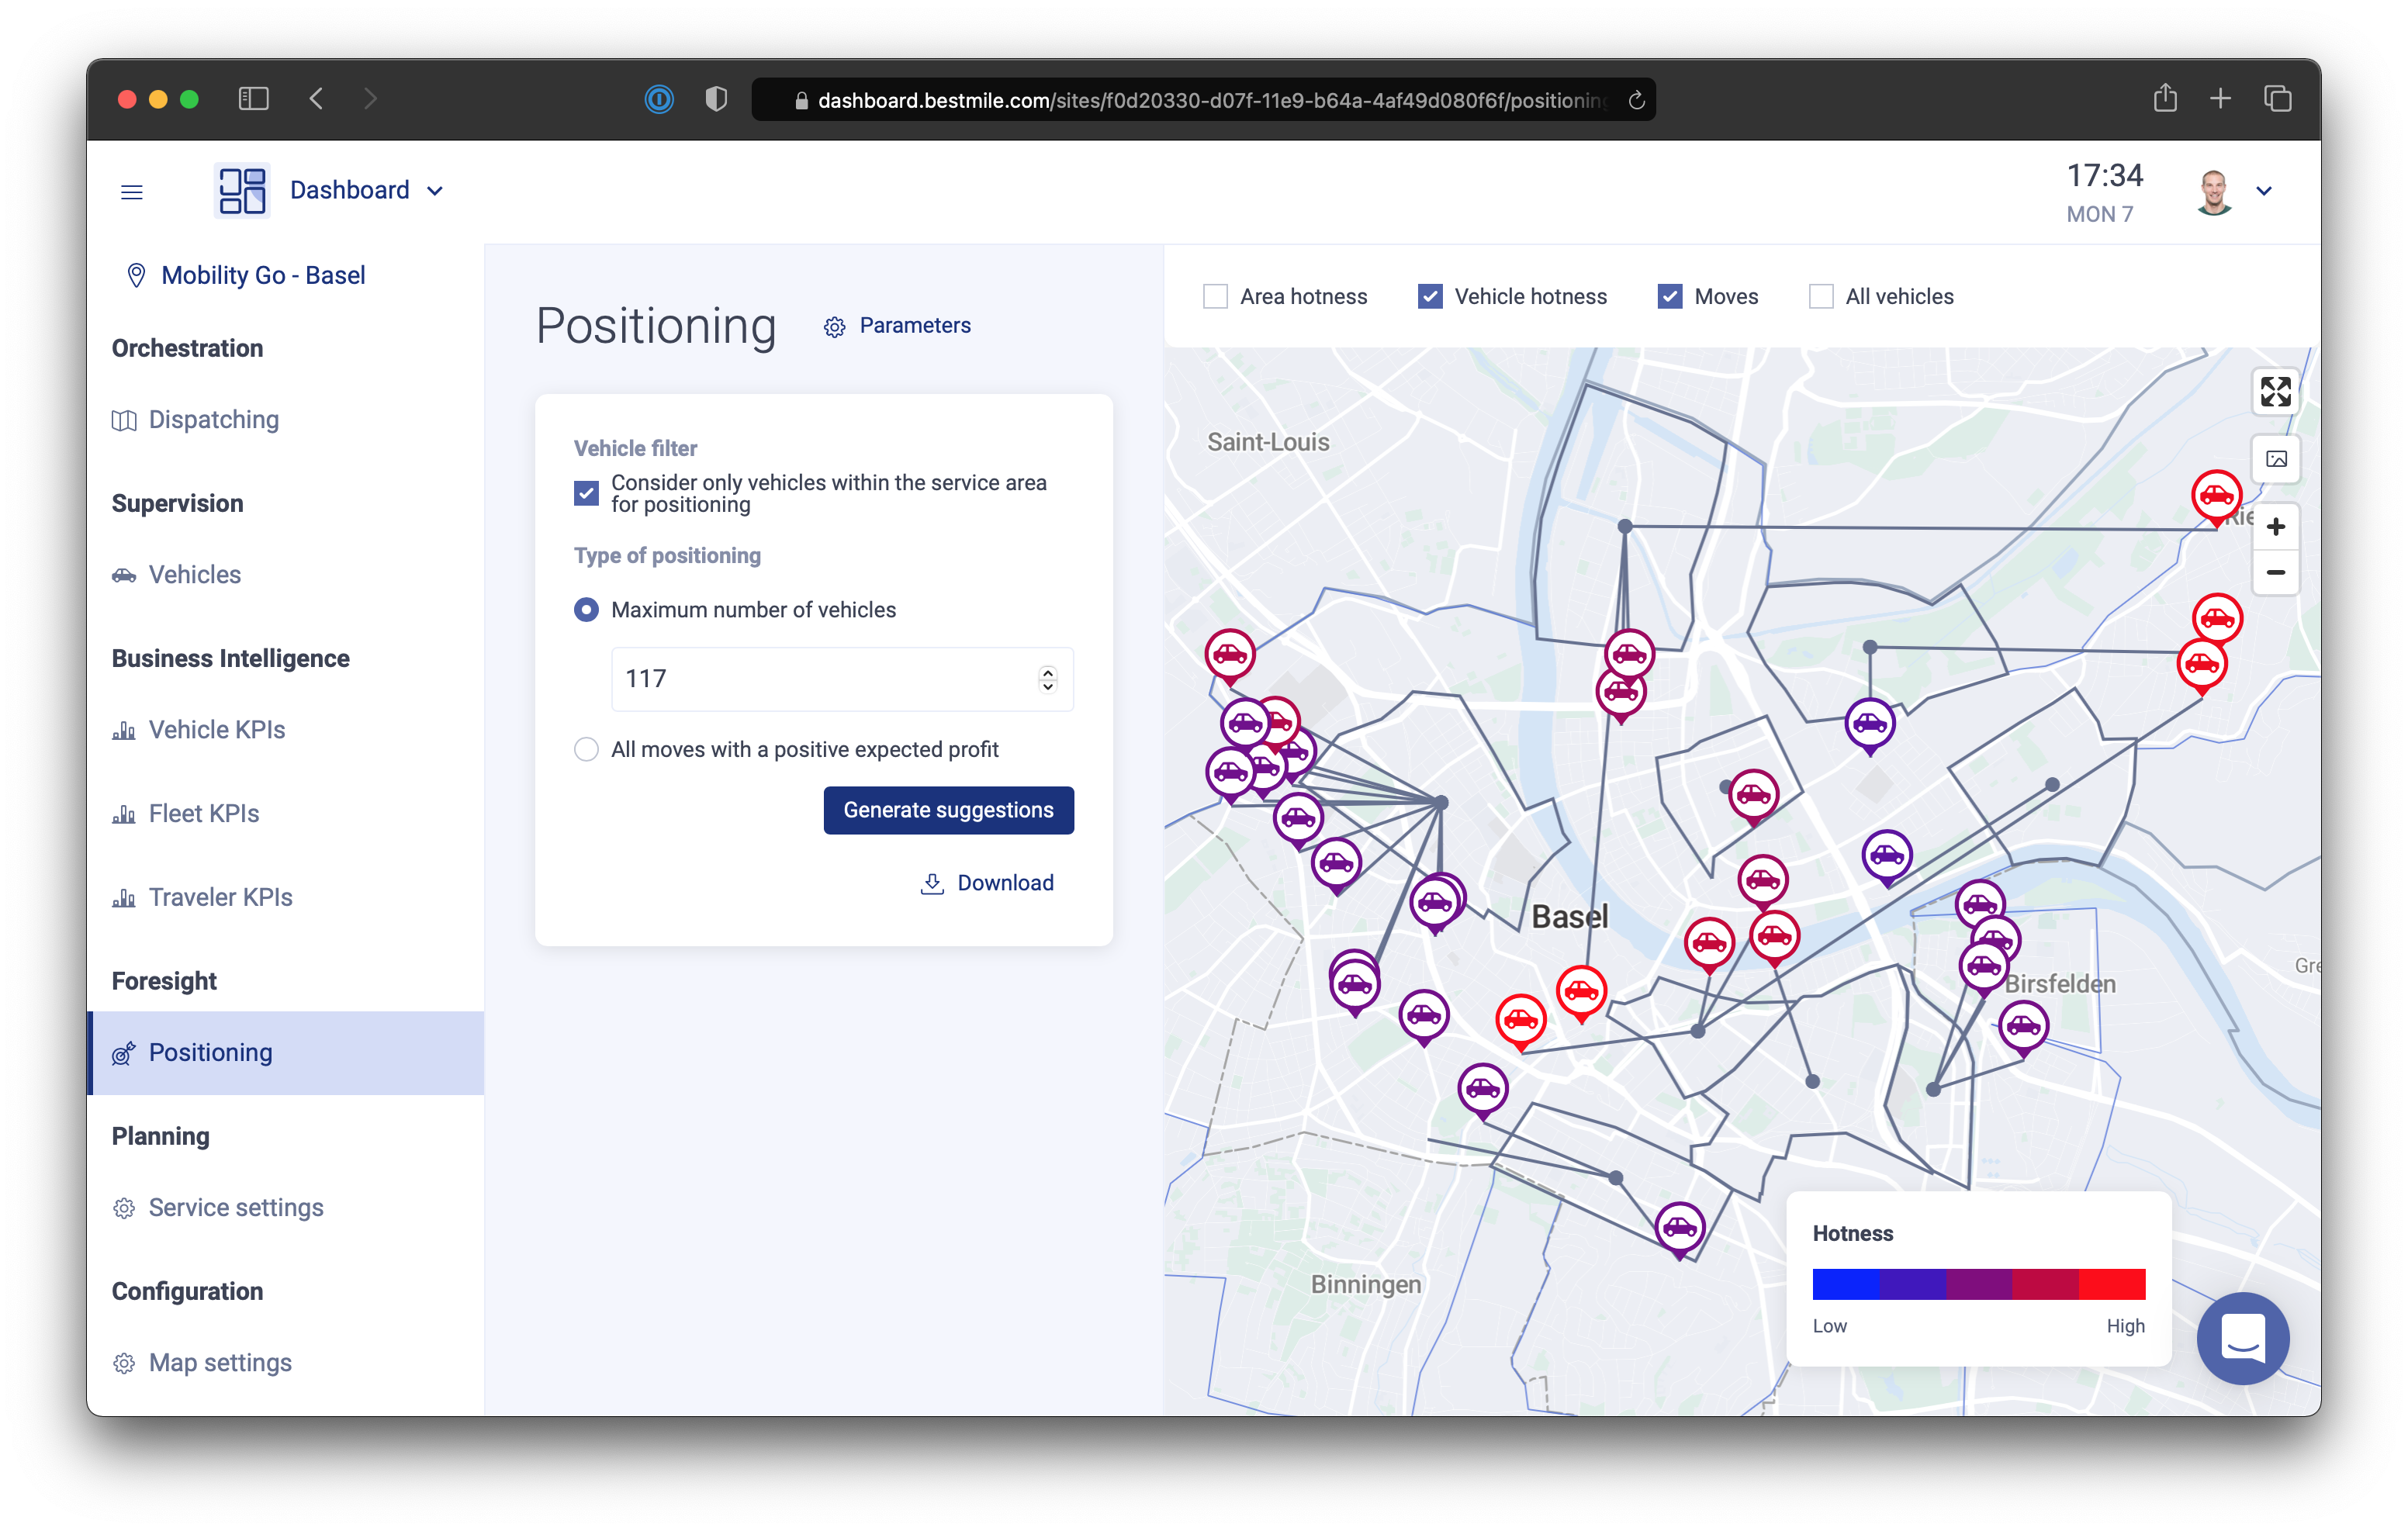
- Dashboard, allowing users to supervise operations in realtime. Some key features: watch vehicles move on a map, with their planned route to serve upcoming pickups and drop-offs; manage rides and bookings; visualize pickup and drop-off locations over time; pre-position a fleet’s vehicles according to historical data; plan your fleet’s time allocation
- Administration, for the management of anything that is not related to live operations: users with fine-grained permissions, vehicles, operational locations, routing contexts, etc.
- Booking Portal, allowing third parties to create bookings
- Dev Tools, for development and demos, to manage simulated fleets and demand
- Account, handling single-sign-on to all other applications
There are also some small on-going experiments and legacy apps I will not emphasize more:
- Stop signage, displaying next departures on e.g. a bus stop
- Web portal, displaying a network of stops and lines
The overall “architecture” of the frontend could be schematized as follows. The nice thing is that none of this was planned much in advance, but evolved quite naturally, taking advantage of Jean-Baptiste’s and my experience.

The next section explains the building blocks of the apps in more detail.
Building blocks
From the beginning, we used React, but we followed its evolution towards hooks and function components. We also opted for Mapbox because it is more dev-friendly than OpenLayers, which was previously used at Bestmile. Like I mentioned before, Jean-Baptiste was the driver in our duo for experimenting with and trying out different libraries and frameworks. In these 3.5 years, we stuck with:
- Flow, which, given recent announcements, we regret a bit using now. TypeScript would have been a safer bet, most likely.
- 4 out of our 5 apps use Nextjs as the application framework. Its conventions work really well for our use case, and it is simpler overall than Create React App.
- Jean-Baptiste likes using Tailwind CSS. It is an improvement over Emotion which we used a bit before, but I still have trouble understanding why CSS needs fixing. I am probably missing something.
- our unit tests use Jest and React Testing Library. The latter’s API is very small and it forces you to write more user-centric tests. We still have remnants of tests using Enzyme and React Test Renderer in the older layers of our code.
- before Shannon created a visual identity for the Bestmile apps, we used Semantic UI. It seemed both the simplest and most complete of the UI frameworks we considered. Other candidates at the time were Rebass, Bloomer, Ant, etc. Today I would for example look into React Spectrum.
- all the components, from button to booking creation funnel, are documented with Docz. It was among the first frameworks to support the very handy .mdx file format. Now we would probably opt for something like Storybook.
After the groundwork was laid down in 2018–2019 and after we had a Dashboard with the most basic functionalities, we started extracting and modularizing our code by creating private NPM packages to share CSS styles, map styles, React components and a JavaScript SDK for the hundreds of Bestmile API endpoints.
Style guide
There is nothing ground-breaking here, and I would tend to think that everybody has a style guide in one form or another nowadays. So far we never got to validate our variables/colors/fonts by creating a dark theme, or a custom theme for a client. That’s usually when you realize some of your assumptions were wrong.
Base components
Over time, Semantic UI components were replaced by our own basic components: button, checkbox, radio, all other form inputs, popup/modal/popover, table, tab, etc.


Some components use other libraries under the hood. For example dropdowns are a wrapper around React Select.
Even if these components are fairly simple, it is the kind of work I have done over and over again. It is a bit annoying that vanilla HTML and CSS still don’t allow for simple styling of checkboxes and radios for example (let’s hope for a better future), that other components like modal dialogs or popups don’t exist, or that date, time, datetime pickers have such varying browser implementations (date and time pickers only recently were implemented in Safari on Mac!)
Shared components
These are components that any app could use, like for example the display of a localized date and/or time. This is typically something Bestmile could open-source.


The components are packaged in a neat little library which you can use in your React component:
import React from 'react'
import { Button } from '@bestmile/react-components'
…
export default function LoginForm() {
  …
  return (
    …
    <form>
      …
      <Button primary>Log in</Button>
      …
    </form>
    …
  )
}
Business-related components
Finally, we have components that are specific to Bestmile’s business. Some are shared among apps, while some reside in one particular app.
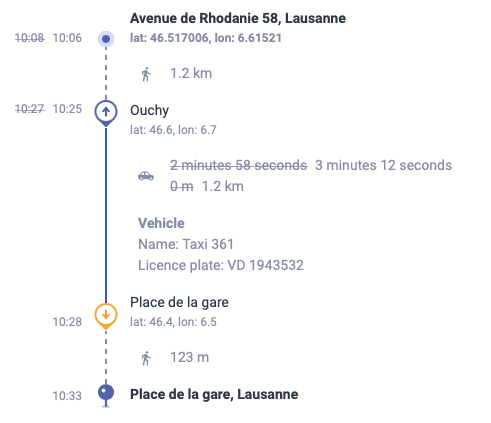
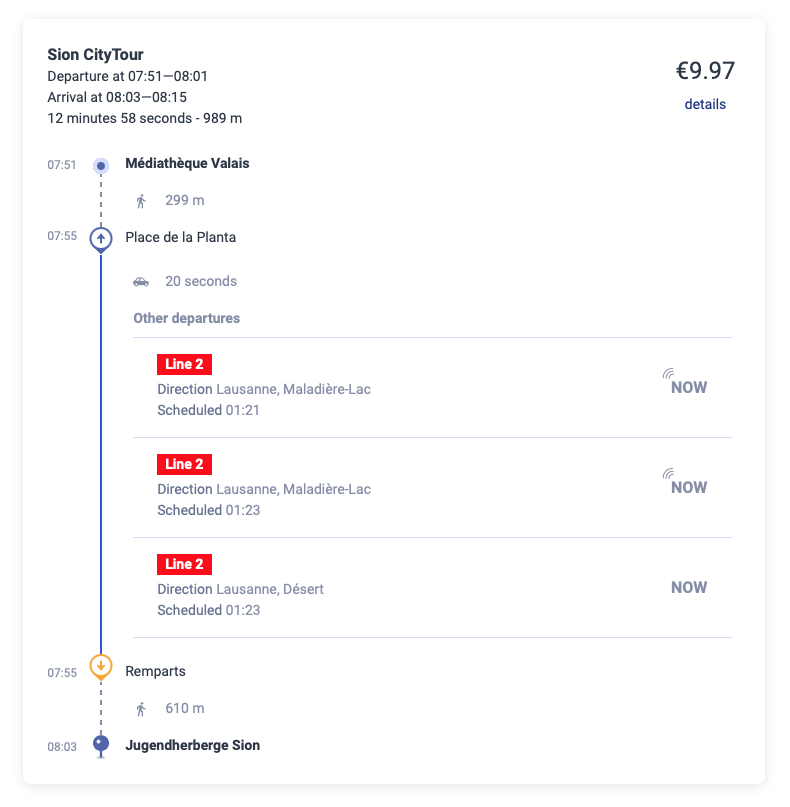
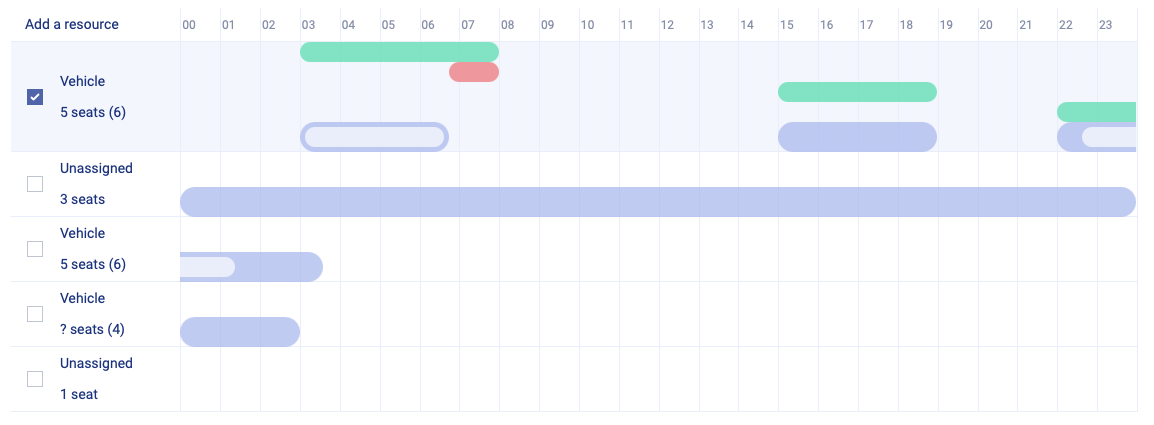
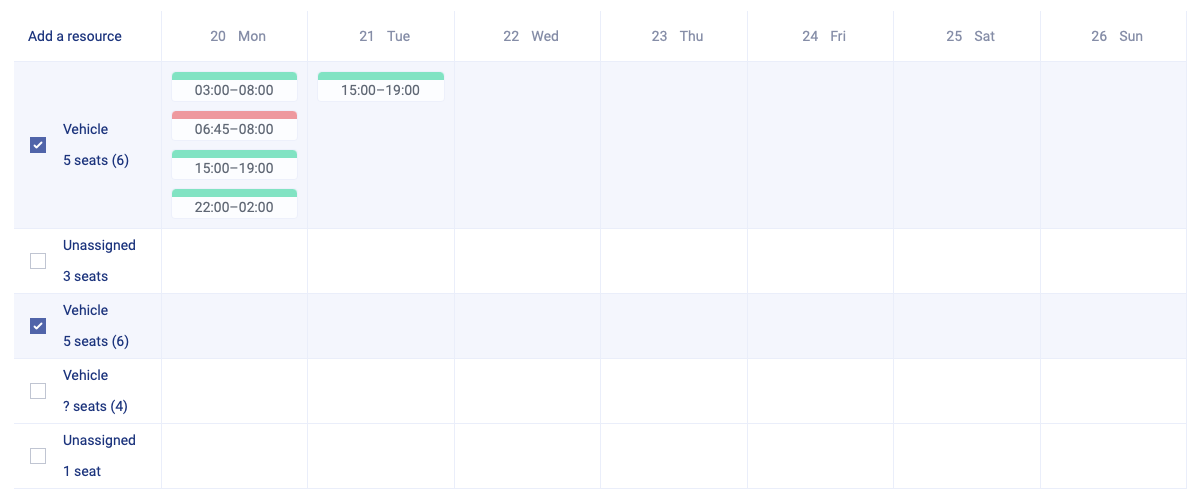
There are of course many many more. Many more.
SDK
At some point we realized that it would be nice to be able to simply call an async function whenever we need to interact with the backend. The URLs would be hidden away, the object structure in case of an error would be consistent, unit test would be simpler, etc.
import sdk from '@bestmile/sdk'
…
const { login, api } = sdk('https://api.staging.dev.bestmile.io')
const { token } = await login(username, password, applicationID)
const vehicles = await api(token).fetchVehicles()
Errors
Properly handling API errors is something I always struggled with. With the backend team, we drew inspiration from RFC 7807 and agreed on a JSON error structure that would allow for error messages to be displayed in the user’s language:
{
   “type”: “https://developer.bestmile.com/docs/api/errors/unique_error_code”,
   “title”: “unique error code”,
   “detail”: “A short message explaining the issue in English”,
   “status”: 400
}
The content-type of the error would be application/problem+json, and the attributes correspond to:
- unique_error_code is a type of error, e.g. validation_error, bad_request, forbidden, not_found, etc.
- title is the error code, but in English. According to the RFC, it must be the same for all instances of that error code.
- detail is an error message in English, mostly destined at developers. It could be used as a fallback message for end-users.
- status is the HTTP status code
This JSON structure can be further extended by extension members. The error translation relies on unique_error_code and the extension members.
Async hooks
Jean-Baptiste came up with 2 handy little hooks we started using in a lot of places.
This snippet fetches all vehicles when the component is initialized:
import { useAsync } from '@bestmile/async-hooks'
…
// in the React component:
const { loading, data } = useAsync(api.fetchVehicles, [])
This snippet allows to poll data. The component starts polling when mounted, and stops when unmounted:
import { useAsync } from '@bestmile/async-hooks'
…
// in the React component:
const { data, startPolling, stopPolling } = useAsync(() => api.fetchRides(…), [])
useEffect(() => {
  startPolling(5000)
  return () => {
    stopPolling()
  }
}, [])
This snippet allows to trigger an API call, for example when a button is pressed, perfect for forms:
import React from 'react'
import { useAsyncCallback } from '@bestmile/async-hooks'
…
export default function AddOperator() {
  …
  const [createOperator, createOperatorResult] = useAsyncCallback(api.createOperator)
  …
  return (
    …
    <OperatorForm
        …
        saving={createOperatorResult.loading}
        onSubmit={createOperator}
    />
    {createOperatorResult.error && (
        <ApiErrorMessage error={createOperatorResult.error}/>
    )}
    …
  )
}
Unit tests
Everything can be easily mocked for unit tests. No need to mock fetch or anything network-related. Let’s look at the unit tests for the component in the previous code snippet:
import React from 'react'
import { createOperator } from '@bestmile/sdk'
…
describe('AddOperator', () => {
  …
  describe('when mounted', () => {
    beforeEach(async () => {
      await act(async () => {
        wrapper = render(<AddOperator />)
      })
    })

    it('renders a form', () => {
      expect(wrapper.container).toMatchSnapshot()
    })

    describe('then the form is submitted and the api returns a success', () => {
      beforeEach(async () => {
        await act(async () => {
          createOperator.mockResolvedValueOnce({})
          fireEvent.click(wrapper.getByText('Save'))
        })
      })

      it('creates the operator', () => {
        expect(createOperator).toHaveBeenCalledWith(…)
      })
    })

    describe('then the form is submitted and the api returns an error', () => {
      beforeEach(async () => {
        await act(async () => {
          createOperator.mockRejectedValueOnce({
            error: { type: 'default', detail: 'Oops' }
          })
          fireEvent.click(wrapper.getByText('Save'))
        })
      })

      it('displays the error', () => {
        expect(wrapper.container).toHaveTextContent('Oops')
      })
    })
  })
})
Miscellaneous niceties
Decoupled frontend
As all calls to the backend are routed through Bestmile’s API Gateway (via the aforementioned SDK), the frontend is completely decoupled from the backend. It means that during development, we do not need to run any of the dozens backend micro-services on our computer. We simply need to point the app we are currently working on to one of our environments’ API Gateway (Staging, QA, Sandbox, Demo or Prod), and voilà!
Dependencies updates
There is an unwritten rule that we update all our dependencies roughly once a month. It’s one of those chores that become more painful the less you do them, so you might as well get to it. If you do it often, even with a lot of dependencies, chances are the increments are smaller, and finding the one library bump that broke your app will be easier. npm-check makes updates fairly straightforward.
Having a good test coverage, even by basic snapshot tests, also helps detecting problems before they reach production.
Unit tests and test coverage
| App | Statements | Branches | Functions | Lines |
|---|---|---|---|---|
| Dashboard | 90.32 % | 84.01 % | 85.09 % | 90.5 % |
| Account | 99.15 % | 95.62 % | 96.39 % | 99.11 % |
| Booking Portal | 93.28 % | 86.43 % | 88.95 % | 94.1 % |
| Administration | 96.76 % | 90.34 % | 96.04 % | 97.27 % |
| Dev Tools | 90.4 % | 82.77 % | 84.94 % | 90.89 % |
While having minimum test coverage expectations of 80-90% is absolutely awesome, you shouldn’t just rely on this metric to consider that your code is well tested. We made big efforts to test components and pages (which are components too) the same way a user would interact with them. React Testing Library really helps achieving that. Here’s an example of the timetable creation page (see the video of that page further down):
import React from 'react'
…
import { bestmileApi } from 'services/rest/bestmileApi'
…
jest.mock('services/rest/bestmileApi')
jest.mock('components/StopsMap', …)
…
const fetchSiteMock = jest.fn()
…
describe('TimetableCreation', () => {
  …
  describe('when the user is allowed to manage timetables', () => {
    beforeEach(async () => {
      await act(async () => {
        wrapper = render(<TimetableCreation …/>)
      })
    })

    it('fetches the site', () => {
      expect(fetchSiteMock).toHaveBeenCalledWith(siteID)
    })
    …
    it('renders a form to enter the timetable basic information and a disabled map', () => {
      expect(wrapper.container).toMatchSnapshot()
    })

    describe('then the 1st step is completed', () => {
      beforeEach(() => {
        fireEvent.change(wrapper.getByTestId('MockDropdown-serviceID'), {
          target: { value: defaultProps.services[1].uuid }
        })
        fireEvent.change(wrapper.getByLabelText('Name'), {
          target: { value: 'Name' }
        })
        fireEvent.click(wrapper.getByLabelText('Enabled'))
        fireEvent.change(wrapper.getByLabelText('Start date'), {
          target: { value: '2021-04-25' }
        })
        …
        fireEvent.click(wrapper.getByText('Next'))
      })

      it('renders a form to add stops to a timetable and a map', () => {
        expect(wrapper.container).toMatchSnapshot()
      })

      describe('then the 2nd step is completed', () => {
        const stop1 = stopsJSON[0]
        …
        beforeEach(async () => {
          await act(async () => {
            fireEvent.change(wrapper.getByTestId('MockDropdown-stops'), {
              target: { value: stop1.id }
            })
          })
          …
          await act(async () => {
            fireEvent.click(wrapper.getByText('Next'))
          })
        })

        it('renders the stops on the map', () => {
          …
        })

        it('fetches routes', () => {
          expect(bestmileApi.fetchRoutes).toHaveBeenCalled()
        })

        it('renders a form to fine-tune the outbound and inbound lines', () => {
          expect(wrapper.container).toMatchSnapshot()
        })

        describe('then a stop is created on the map', () => {
          …
          describe('then the created stop is updated (name changed and service re-assigned)', () => {
            …
            describe('then a stop is deleted (via the map popup)', () => {
              …
              describe('then the 3rd step is submitted and the creation succeeds', () => {
                beforeEach(async () => {
                  bestmileApi.createTimetable.mockResolvedValueOnce(…)
                  await act(async () => {
                    fireEvent.click(wrapper.getByText('Save'))
                  })
                })

                it('attempts to create a timetable', () => {
                  expect(bestmileApi.createTimetable).toHaveBeenCalledWith(…)
                })
                …
              })
            })
          })
        })
        …
      })
    })
  })
  …
})
The test descriptions read similarly to feature specifications:
when the user is allowed to manage timetables
  ✓ fetches the site
  ✓ fetches the services
  ✓ fetches the stops
  ✓ renders a form to enter the timetable basic information and a disabled map
  then the 1st step is completed
    ✓ renders a form to add stops to a timetable and a map
    then the 2nd step is completed
      ✓ renders the stops on the map
      ✓ fetches routes
      ✓ renders a form to fine-tune the outbound and inbound lines
      then a stop is created on the map
        ✓ creates the stop
        ✓ assigns the stop
        ✓ adds the created stop to the line
        then the created stop is updated (name changed and service re-assigned)
          ✓ updates the stop
          ✓ assigns the stop
          ✓ removes the updated stop from the line because it is not assigned to the correct service
          then a stop is deleted (via the map popup)
            ✓ deletes the stop
            ✓ removes the stop from all the lines
            then the "Show all stops" checkbox is clicked
              ✓ displays all stops on the map
            then the 3rd step is submitted and the creation succeeds
              ✓ attempts to create a timetable
              ✓ continues to the edition page
      then the 3rd step is submitted but the creation fails
        ✓ displays an error message
      then the 1st step is changed
        ✓ resets to the 2nd step with no stops selected
when the user is not allowed to manage timetables
  ✓ renders an empty page
Type checking
I have been coding in JavaScript in the last 10+ years, so I’m fairly used to weak typing. We started using Flow because it seemed less tedious to partially introduce it than converting files to TypeScript. I’m honestly still not convinced by the grafting of types onto an untyped language. It works most of the time, but the chain of typing is easily broken, resulting in any types, the equivalent of no typing. Flow is also still problematic with basic JavaScript functions like map() or reduce().
But for all the DTOs in our SDK, Flow is pretty useful:
…
opaque type Latitude: number = number
opaque type Longitude: number = number
…
type Site = {
  siteID: string,
  geographic: {
    extent: SiteExtent,
    center: [Latitude, Longitude]
  },
  name: string,
  disabled: boolean,
  timeZone: string,
  currency: string,
  countryCode?: string
}
…
type MultiLineString = {
  type: 'MultiLineString',
  coordinates: Array<Array<[Longitude, Latitude]>>
}
…
The use of opaque types for latitudes and longitudes for example is very useful too because some APIs have coordinates as [latitude, longitude] pairs, while some others have them as [longitude, latitude]. It happened more than once before we introduced these types, that coordinates would be flipped for markers displayed on maps.
Code review and releases
At my previous job, we used to work on a feature for a couple of days, then create a pull request. The code would be checked out, ran, tested and reviewed thoroughly. The requirements for the feature would also be verified, sometimes even by the product manager who could run any branch on a temporarily created environment. At Bestmile, the policy was to have super small pull requests, almost like 1 commit = 1 pull request. At first I had some trouble adjusting, because it meant many smaller interruptions every day instead of one bigger interruption every other day. In the end, I’m not sure which one I prefer. To be honest, at Bestmile, also because Jean-Baptiste’s code is very good and because the feature requirements often leave room for interpretation, I often just reviewed the code, without checking it out and running it. It certainly allows to move faster and iterate on features. I was also lucky in working with Jean-Baptiste, because most pull requests would get reviewed within the hour, and none would stay unreviewed for more than 24h.
After a feature sitting on a branch gets approved, the pull request gets merged to master, then auto-deployed to the Staging environment. It then takes a tiny bit of human intervention to push the app’s built Docker image from the Staging to the QA environment. Some end-to-end and smoke tests are then ran on the QA environment. At each step you should still have a quick look at your feature, despite all the automatic tests. If everything works fine, you can merge the Docker image changes to the Sandbox environment. Like its name suggests, the Sandbox is for clients to test our platform and APIs. To give them some time to adapt to changes, we would usually have a 24h delay between updates to Sandbox and Production. We also have a Demo environment for our sales department to show off the entire Bestmile solution. Vehicles are simulated 24/7 on that environment, with ride requests coming in all the time. This basically means that the Demo environment has to be treated as a second Production environment, with no interruption allowed.
Deployments to Production can happen at any time, usually several times a week. On the frontend, we would often use “beta flags” to hide partially implemented features. Everything is built upon Docker containers, Helm and Kubernetes. Bestmile uses Codefresh for CD/CI and runs everything in the ubiquitous Amazon cloud.
i18n
React-intl and the improvements done to the native Intl make it quite easy nowadays to build an app with translations and localized data. Things get a bit hairier when you have to deal with US Customary units. It is also annoying that there are no official, well maintained and updated, basic and standard lists of time zones, currencies, countries, phone number formats and prefixes, etc.
Miscellaneous ugliness
Before moving on to a visual bonanza of awesome screenshots and videos, let me list a couple of not-so-niceties:
- at no point during the development, we took care of a11y. There are bits here and there about keyboard navigation, and we fixed some bad color contrasts, but nothing more really. I’m actually curious how a visually or physically impaired (e.g. cannot use a pointing device) person navigates and uses a heavily map-based UI.
- from the get-go, we were told to officially support the Chrome browser only. Jean-Baptiste however uses Firefox daily, and I recently ditched Chrome for Safari, so we ensured that our apps weren’t completely botched. I also occasionally made sure it would work on a tablet form factor.
- I still have never created an RTL layout in my career as a frontend developer. We would have had some opportunities to use arabic script and a mirrored layout with clients in the United Arab Emirates, but English was good enough for them.
- despite our high test coverage — and this illustrates why relying only on this metric is flawed — many parts of our apps involving maps are poorly tested because you basically have to mock the whole Mapbox API.
UI challenges
To close this little tour of frontend development at Bestmile, here’s a handful of the interfaces that were more fun to work on, each with some interesting challenges.

Fun times!